Tuesday, April 17, 2012

Match Material

This showing is from my Digital Materials and Textures class.  The objective was to take pictures of real world objects around us on our own - 5 completely different textures.  With that we would attempt to match the texture within Maya demonstrating our knowledge within Maya's Hypershade.  The scene was set up for us as a sampler, so its not a fancy model or anything.. just basic shapes.  The main requirement was to at least have 2 painted color maps, 2 painted bump maps, 1 procedural bump map, 1 displacement map (painted or procedural), 2 specular maps (painted or procedural), and of course to take the pictures on our own.  Here show the 5 textures as stills, and a required mov file to demonstrate some sort of breakdown.  I only wish I had a better camera to get closeups that were not blur.

-They of course enlarge if you click on them-


-and finally the video-

Sunday, April 1, 2012

The Pocketwatch

The pocket watch is a procedural animation using expressions through the translate node. Nothing is key framed what so ever, using 'if' statements and the 'sin' expression with '$F' (frame) this give the ability to make the watch move over time in the frames. The main goal is the make the item look like it is attempting to flutter upon a desk. For some reason old books are associated with the pocket watch so it makes for a fitting scene
________________________________


Inspirations:


________________________________

Rendered Still Shots from Video:
-click to enlarge pictures-


________________________________

Close up ScreenCapture: 


It was fully modeled in Houdini like the last projects, the background of books being Uved' with textures applied to them, another new thing I learned within the program.  The table was the original wood material edited to get the desired look I wanted. For this project I included light linking for the first time discovering it and over all got the feel to the project as I saw it. In my short time of using Houdini I feel my ability within the program is definitively increasing with each new trick I learn. Sadly enough when I placed my video in you tube it made it all pixelated and gross... so I threw it in Vimeo... and it was only slightly better. This is the temporary video for it until I find a better way to present it.


________________________________
________________________________


video link above


Saturday, March 31, 2012

Procedural Building

First actual project in Houdini, created a procedural building that the width, height, and depth can be changed within a user interface.  It was a tester building to see what I could do within the program, along with what was stated the shutters are adjustable too.  Here's a quick screen capture of whats going on.  Preferably view in YouTube to see detail and at a larger scale.


All the movement leads from the main 'house' node, a box.  Using 'ch(".../"....")' statements with added math to align things up correctly so nothing randomly came off of the building.  As seen below for example.


Of course from starting small house I wanted to add on another side building to make it a bit more interesting. So as you saw in the video, I in fact did.  I'd pop up once the house size reaches a certain point, and disappearing on que when that point is decreased.  The windows work that they as well, all from 'copy' nodes.  Here is a look as to how it was set up, an example of the side building.


I wont go in depth anymore than state the basics of how to project worked, but since completing this I do know that I'll attempt to set up an intricate castle and even a city scene with making one building with a lot of different attributes at one point as a personal project since I got the basic understanding of this project down.
Finally here is just a show of the rendered piece of the house.


Friday, March 23, 2012

Copy Stamping

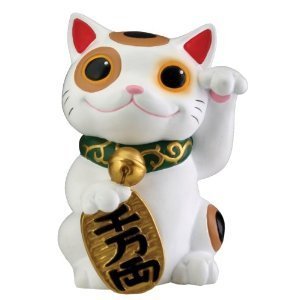
For the next assignment as an exercise we were asked to create a 'procedural forest' using the copy stamp and copy node to see what you would achieve using it.  The scene didn't exactly have to be a forest copying over trees, or modeling a pond with lily pads. It had to be something where an object was seen over and over again but slightly altered and had a meaning for its location.  My inspiration ended up be the 'Chinese lucky cats' you see in restaurant or in flea markets.  Such as this little guy.


Given we were asked to have basic scene such as copy stamping simple things like skittles, thumbtacks, ext. my desire for creating the little character was a bit to strong.  This lead to my first steps of modeling in Houdini, which was nothing as I thought it would be.  At first it was a challenge seeing as nodes didn't do as I expected them to do, and relating Houdini modeling to Maya just didn't work to well.  Eventually I got the hang of it, but looking back at the work flow now I can tell I would have done much better.


-Whole Tree for Cat-


Along with creating the cat a shelf was added into the scene called 'container' to make the cat belong, the intent was the make the copy stamp node adjust the cats sizes.  With that the belly marking would increase or decrease in size, the belly's anger would change and there would be change in rotation to the cats based on the frame range they were set at.


Once set up the out come came to look as this.


To also note within the node tree the area the cats rest on are set up point based.  Using the same copy3 node as you saw above attached to it is a grid and the 'lucky-cat' model.  Depending on how many points there are upon the grid decided what number of cats will be set out.  Completing that part of the project my final move was the light the scene, set up a camera and render it out.  Given I was, and still am learning about lighting the final image came out as so


Over all the assignment was enjoyable and I had learned quite a bit with modeling within the program among other things.  When/If i revisit the project in the future with more experiences I'll add in different lights using light linking to get better shadows and over all look, create a more ceramic or toy like 'material'/'shader', and edit the cats model.  At this point I would even consider making a whole small store using the copy/copy stamping and procedural animate it using expressions.